
After you’ve set the proper metrics and created the right ads, your store will enjoy more visibility and sales.
Shopify store marketing campaign on Facebook tutorial
For this post, we will cover the following steps for your Shopify marketing campaign on Facebook:
Step 1. Setting up your Facebook Business Manager
Step 2. Installing Facebook Pixel on your Shopify store
Step 3. Retargeting and prospecting
Step 4. Creating ads and campaign
Step 5. Configuring your ad metrics
Step 6. Set specific ad triggers
Step 7. Optimize your campaigns
Let’s get started…
Start Your 14-day Free Shopify Trial
Step 1. Setting up your Facebook Business Manager
Before we dive deep in creating an account and all the marketing whatnots, we first have to set up your Facebook Business Manager. This is where your ads will be headquartered, serving as Facebook ads manager. It also has all the tools that will let you run ads and monitor them.
Start by going to business.facebook.com and proceed with “Create Account”. Take note that you need to create a business page first since Facebook will ask for this upon sign up. Also, you’d have to enter your business name, name, and email to create an account.
After that, you’ll create an advertising account. Go to the “Business Manager” menu then choose “Business Settings”. From there, go to “Accounts” and click on “Ad Accounts”.
On this page, you can add your create a new ad account or add your existing one. You can also request access to an existing ad account. After you’ve supplied the account, click “Create New Ad” and follow the succeeding steps.
Once you successfully connected your Facebook Business Manager to your business’ Facebook page, you should be done on this step.
Step 2. Installing Facebook Pixel on your Shopify store
So what’s going to connect your Shopify store and your Facebook Business Manager? This is where Facebook Pixel comes handy.
Facebook Pixel are lines of codes generated on your Facebook Business Manager account and added to your website. This serves as the bridge between the two pages. With this, you can track the behavior of each customer that goes into your store via your Facebook ads.
Facebook Pixel lets you gauge if your ads are working or not. Aside from that, you’ll know exactly where your sales come from and which demographics yield the best conversions.
This information will let you improve your next campaigns by targeting your best possible customers.
To add Facebook Pixel to your Shopify account, just copy and paste the 16-digit Pixel ID from your Facebook Business Manager to the Facebook Pixel ID field that you can find under “Online Store” > “Preferences”.
After adding the Pixel ID to your store, you can start seeing stats within a few hours after given that you have a campaign already launched.
To see the numbers, just go to your Business Manager Account and click “Pixels”.
Step 3. Retargeting and prospecting
Before you create a Facebook campaign and ads, you first have to configure your audience. Setting the right metrics for the people you want to target is the key to a successful campaign.
Under the Audience section on your Facebook Business Manager, you can create lists of people you want to target using your ads. Basically, this part is divided into two: retargeting and prospecting.
Retargeting is when someone has shown interests or has performed something that makes them a potential customer. It can be someone who followed your page on Facebook or a customer who already added an item into cart but hasn’t checked out yet.
Retargeting lets you convert warm audience by increasing the visibility of the ads, specifically ads of the items they already viewed.
Meanwhile, prospecting is the process of finding new customers. This would be a good option, especially if your warm leads proved to be difficult or impossible to convert.
You can use the Lookalike Audience tool to target new customers that share similarities with your customers on your Retargeting campaign.
In case you don’t have a list of previous customers to base your Lookalike campaign on, you can use the Facebook demographics of your potential customers. It includes their browsing behavior, interest, age bracket, and more.
You can narrow down your list by using the Audience Insights where you can perform category testing on your initial list of new customers.
Step 4. Creating ads and campaign
Before you create ads, you have to set up a campaign first. This is like a folder where all your ads will be compiled. Each campaign will have individual ad sets as part of an efficient Facebook ecommerce strategy.
Now that you have your targets set, it’s time to create your ads. Start by going to the ad creation tool of Facebook. For an easier option, just click the “Ads Manager” tab on your business’ home page. You can also access the same tool under the Pages menu by choosing the “Create Ad” option.
After clicking this, you’d have to choose the objective of your ad. The options include the following:
- Website conversion
- Clicks to website
- Page likes
- Page post engagement
- App engagement
- App installs
- Event responses
- Local awareness
- Video views
- Offer claims
- Brand awareness
- Product catalog promotion
- Lead generation
After choosing the objective, you’re now going to select your audience based on what you set above.
Next, select where you want your ads to appear. The placement could be on Instagram, Mobile News Feed, Desktop Right Column, and so on.
After that, set the budget that you have for your ad. Also, don’t forget to set a schedule. This lets you limit your spending while targeting the best time to place the ads.
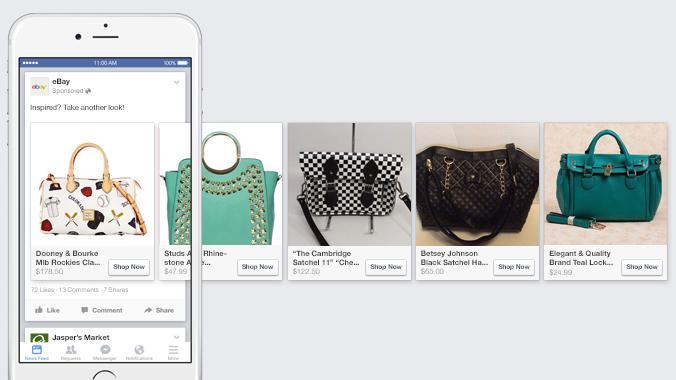
Next, add the image that you’ll use for the ad and type the text. After that, tick your Facebook page and enter your Shopify store’s URL. Once you’re all set, click the “Place Order” button.
Take note that you’ll have to enter your payment info after placing your order. After that, you already launched the first Facebook ad for your store.
Tip: You can make individual ads for each product or collection.
Step 5. Configuring your ad metrics
For this part, we will delve deeper on scheduling and setting the budget for your ads. The good thing about Facebook ads is you have full control over the amount you’re going to spend.
Our rule of thumb is to spend what you can afford. Also, if your items are expensive, you’ll usually need to spend more on ads to gain conversions.
You have to understand that sales-focused objectives will cost more than awareness-based ads.
It’s easy to think that spending less is the safest way. However, you have to give Facebook a fair shot by allocating a reasonable budget.
You wouldn’t gain conversions right away. Facebook ads indeed have a steep learning curve, but with a little practice, you could master it over time.
Step 6. Set specific ad triggers
Ad triggers are where you’ll see Facebook ads in action. These are the conditions you set that will trigger the placement of your ads. For example, page views, adding an item to the cart, or making a purchase will trigger a specific add to appear on your customer’s feed.
Again, the goal here is to invite them to your Shopify store, not to push them away by setting overly pushy triggers.
To do this, you’d have to paste the proper Dynamic Products Ad (DPA) code on your Shopify’s website code files. This will initiate the trigger based on your customer’s behavior.
If you don’t have much background with coding and web development, it’s best to tap the help of an experienced web developer to do this. Do the same when Shopify won’t connect to Facebook.
Step 7. Optimize your campaigns
Here, you’ll know how to use Facebook ads for ecommerce. To make the most out of your campaigns, make sure that you separate View and Add to Cart behavior segments. With this, you’ll create unique ads for both behavior groups. Through this, you can employ your retargeting efforts more efficiently.
Here’s one starter tip: leads that only view your product are those who still need more information about it. This means your ad has to supply that additional information that will stir to action (conversion).
Also, don’t be such a bugger. One impression a day should be enough. Going beyond that is the formula for your consumers to start hating your brand.
Most importantly, refresh your ad copy. Use a different image and CTA so your potential leads won’t get tired of it.
Conclusion
A Shopify Facebook ads strategy should help you gain more views, clicks, and conversion. It could be technical at first, but a little practice should go a long way. What do you think of our Facebook ad guide? Let us know below!